
In this article we are going to see how we can upload images or any files to Media Service Account in Azure. If you are new to Azure media service account, I strongly recommend you to read my previous post related to media service account. Once we create a media service account, we will create an asset and get the SAS token related to the asset we created, we will discuss more about asset and SAS token. I hope you will like this.
Download the source code
You can always download the source code here: Azure Media Service From Client Side
Background
For the past few weeks I am working in Azure . Recently I got a requirement of storing images to Azure. Thus I decided to create a media service account for this requirement. The tricky part was I needed to upload the files from client side itself. Here we are going to see how we can create an Azure media service account and how to use the same.
What is media service account?
Please be noted that your storage account region must be same as your media service account region.
Prerequisites
If you are a start up company or you are in thinking to start a one, you can always go for BizSpark(Software and services made for the start ups), to join please check here: How to join bizspark. Or you can always create a free account here.
Things we are going to do
The following are the tasks we are going to do.
If you don’t have an Azure account with active subscription, you must creates it first before going to do this task.
Now we will go and create our media service account.
Create an Azure media service account
To create an azure media service account, please see the link given below. I have explained the steps there.
Hope you have got the storage account and media service account with you.
Create an Asset in Media service account
You can always create an Asset either via code or manually in https://portal.azure.com.
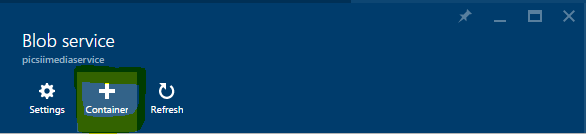
Blob Service In Portal

New Container
If you want to create the Asset via code, you can create as below.
[csharp]
public static string CreateBLOBContainer(string containerName)
{
try
{
string result = string.Empty;
CloudMediaContext mediaContext;
mediaContext = new CloudMediaContext(mediaServicesAccountName, mediaServicesAccountKey);
IAsset asset = mediaContext.Assets.Create(containerName, AssetCreationOptions.None);
return asset.Uri.ToString();
}
catch (Exception ex)
{
return ex.Message;
}
}
[/csharp]
You can always get the sample codes for creating the assets from here: Azure Media Service Account
Get the SAS token for an Asset
Before going to generate SAS, we want to know what is a SAS right?
What is SAS?
SAS stands for shared access signature, it is the mechanism used for giving limited access to the objects in your storage account to your clients, in the way that you do not need to share your account key. In SAS, you can set how long the given access must be active and you can always set the read/write access too. If you want to know more about the SAS, I recommend you to read here.
Once you downloaded the application from here, you can add a function to generate the SAS token dynamically
[csharp]
private static string GenerateSASToken(string assetId)
{
CloudStorageAccount backupStorageAccount = CloudStorageAccount.Parse(myAzureCon);
CloudBlobClient client = backupStorageAccount.CreateCloudBlobClient();
CloudBlobContainer container = client.GetContainerReference(assetId);
BlobContainerPermissions permissions = container.GetPermissions();
permissions.SharedAccessPolicies.Add(string.Concat(assetId, "AccessPolicy"), new SharedAccessBlobPolicy
{
Permissions = SharedAccessBlobPermissions.Read | SharedAccessBlobPermissions.Write,
SharedAccessExpiryTime = DateTime.UtcNow.AddDays(365)
});
permissions.PublicAccess = BlobContainerPublicAccessType.Container;
container.SetPermissions(permissions);
ServiceProperties sp = client.GetServiceProperties();
sp.DefaultServiceVersion = "2013-08-15";
CorsRule cr = new CorsRule(); cr.AllowedHeaders.Add("*");
cr.AllowedMethods = CorsHttpMethods.Get | CorsHttpMethods.Put | CorsHttpMethods.Post;
cr.AllowedOrigins.Add("*");
cr.ExposedHeaders.Add("x-ms-*");
sp.Cors.CorsRules.Clear();
sp.Cors.CorsRules.Add(cr);
client.SetServiceProperties(sp);
var sas = container.GetSharedAccessSignature(new SharedAccessBlobPolicy(), string.Concat(assetId, "AccessPolicy"));
return container.Uri + sas;
}
[/csharp]
Here we are giving the asset id of the asset we just created. And the function will give you the SAS token we need. Hope you understood. Now we can start our client side coding for uploading.
Client side upload process
Create an index page with an input file and other needed UI as follows.
[html]
<!doctype html>
<html>
<head>
<meta charset="utf-8">
<meta name="viewport" content="user-scalable=no, initial-scale=1, maximum-scale=1, minimum-scale=1, width=device-width">
<link href="CSS/Index.css" rel="stylesheet" />
</head>
<body>
<div class="container">
<div class="thumbnail-fit" id="azureImage">
<div id="fiesInfo"></div>
<div id="divOutput"></div>
</div>
</div>
<div id="uploaderDiv">
<form>
<span class="input-control text">
<input type="file" id="file" multiple accept="image/*" name="file" />
</span>
<br />
<br />
<input type="button" value="Upload File" id="buttonUploadFile" />
</form>
</div>
<script src="scripts/jquery-1.10.2.min.js"></script>
<script src="scripts/jquery-ui-1.9.2.min.js"></script>
<script src="scripts/Index.js"></script>
</body>
</html>
[/html]
Now create a JS file Index.js. And create a file change function as follows. Sounds good?
[js]
$(document).ready(function () {
$(‘#fiesInfo’).html(”);
$(‘#divOutput’).html(”);
upldCount = 0;
totSize = 0;
$(‘#file’).change(function () {
selectedFile = [];
if (this.files.length > 0) {
$.each(this.files, function (i, v) {
totalFileSize = totalFileSize + v.size;
selectedFile.push({ size: v.size, name: v.name, file: v });
});
}
});
});
[/js]
Here we are pushing the selected files to an array in a needed format. Now we will add the upload click event.
[js]
$("#buttonUploadFile").click(function (e) {
upload();
});
[/js]
And following is the code for the function upload.
[js]
function upload() {
$(‘#fiesInfo’).html(”);
$(‘#divOutput’).html(”);
upldCount = 0;
totSize = 0;
startDateTime = new Date();
$(‘#fiesInfo’).append(‘<span><b> Uploading starts at </b></span>’ + startDateTime);
if (selectedFile == null) {
alert("Please select a file first.");
}
else {
for (var i = 0; i < selectedFile.length; i++) {
fileUploader(selectedFile[i]);
upldCount = upldCount + 1;;
totSize = totSize + selectedFile[i].size;
}
}
};
[/js]
Did you notice that we are calling a function inside a loop which accepts file content as parameter?
[js]
function fileUploader(selectedFileContent) {
reader = new FileReader();
var fileContent = selectedFileContent.file.slice(0, selectedFileContent.size – 1);
reader.readAsArrayBuffer(fileContent);
reader.onloadend = function (evt) {
if (evt.target.readyState == FileReader.DONE) {
var currentAzureStorageUrl = baseUrl;
var indexOfQueryStart = currentAzureStorageUrl.indexOf("?");
var uuid = generateUUID();
var fileExtension = selectedFileContent.name.split(‘.’).pop();
var azureFileName = uuid + ‘.’ + fileExtension;
submitUri = currentAzureStorageUrl.substring(0, indexOfQueryStart) + ‘/’ + azureFileName + currentAzureStorageUrl.substring(indexOfQueryStart);
var requestData = new Uint8Array(evt.target.result);
ajaxUploadCall(submitUri, requestData);
}
};
}
[/js]
Here baseUrl is the SAS you just created for an asset. The example of SAS is https://myaccount.blob.core.windows.net/sascontainer/sasblob.txt?sv=2015-04-05&st=2015-04-29T22%3A18%3A26Z&se=2015-04-30T02%3A23%3A26Z&sr=b&sp=rw&sip=168.1.5.60-168.1.5.70&spr=https&sig=Z%2FRHIX5Xcg0Mq2rqI3OlWTjEg2tYkboXr1P9ZUXDtkk%3D
Once the reader onloadend event is finished we are passing the uri and data in the format of array. Can we see the AJAX call now?
[js]
function ajaxUploadCall(submitUri, selectedFileContent) {
$.ajax({
url: submitUri,
type: "PUT",
data: selectedFileContent,
processData: false,
async: false,
beforeSend: function (xhr) {
xhr.setRequestHeader(‘x-ms-blob-type’, ‘BlockBlob’);
},
success: function (data, status) {
},
complete: function (event, xhr, settings) {
compCount = compCount + 1;
if (selectedFile.length == compCount) {
RptDisplay();
}
},
error: function (xhr, desc, err) {
}
});
}
[/js]
In your ajax call please do not forget to add the header as below.
[js]
beforeSend: function (xhr) {
xhr.setRequestHeader(‘x-ms-blob-type’, ‘BlockBlob’);
}
[/js]
If every selected files are uploaded we are calling a function RptDisplay() right?
[js]
function RptDisplay() {
$(‘#divOutput’).hide();
$(‘#fiesInfo’).append(‘<table></table>’);
$(‘#fiesInfo table’).append(‘<tr><td><b>No of files uploaded: </b></td><td>’ + upldCount + ‘</td></tr>’);
$(‘#fiesInfo table’).append(‘<tr><td><b>Total size uploaded: </b></td><td>’ + formatSizeUnits(totSize) + ‘</td></tr>’);
var endDateTime = new Date();
$(‘#fiesInfo table’).append(‘<tr><td><b>Uploading ends at </b></td><td>’ + endDateTime + ‘</td></tr>’);
$(‘#fiesInfo table’).append(‘<tr><td><b>The time taken is </b></td><td>’ + findDateDiff(startDateTime, endDateTime) + ‘</td></tr>’);
$(‘#divOutput’).show();
};
[/js]
You can get all the other needed functions like findDateDiff(), formatSizeUnits(), generateUUID() and the CSS from the source code attached. Please download the same. Now please run your page and you can find an input file there, select few files and try upload, if you have configured everything fine, I am sure you will get a report. Let us see that now.

Upload File
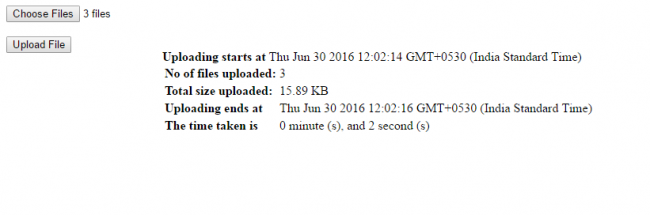
Upload File Output
Retrieves the uploaded items
To retrieve the items you can always create a function as follows, which accepts asset id as parameter.
[csharp]
public string getEventImage(string assetID)
{
CloudStorageAccount backupStorageAccount = CloudStorageAccount.Parse(myAzureCon);
CloudBlobClient client = backupStorageAccount.CreateCloudBlobClient();
CloudBlobContainer container = client.GetContainerReference(assetID.Replace("nb:cid:UUID:", "asset-"));
List<string> results = new List<string>();
foreach (IListBlobItem item in container.ListBlobs(null, false))
{
results.Add(item.Uri.ToString());
}
return JsonConvert.SerializeObject(results);
}
[/csharp]
Now if you login to your azure portal and click on the asset you created, you can see the contents are uploaded there.
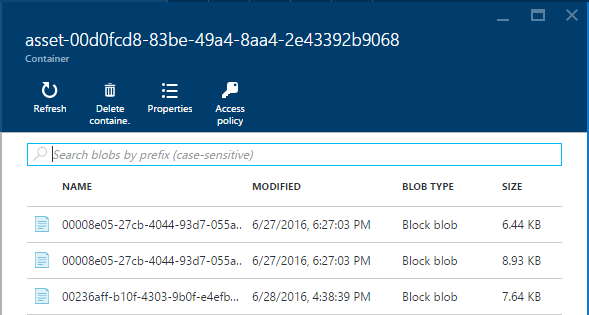
Uploaded Contents
Conclusion
Did I miss anything that you may think which is needed? Have you ever tried Azure media service account? Could you find this post as useful? I hope you liked this article. Please share me your valuable suggestions and feedback.
Your turn. What do you think?
A blog isn’t a blog without comments, but do try to stay on topic. If you have a question unrelated to this post, you’re better off posting it on C# Corner, Code Project, Stack Overflow, Asp.Net Forum instead of commenting here. Tweet or email me a link to your question there and I’ll definitely try to help if I can.
Kindest Regards
Sibeesh Venu