

[toc]
Introduction
I understand that you need to move all of your contents to your destination site from your source site in SharePoint online. You might have done some search in Google and saw this post. Here in this article, I will be walking you through the steps you need to perform the SharePoint PnP provisioning. With the latest SharePoint modern experience, Microsoft had decided to turn off some features, and one among them was Custom Scripting. Unfortunately, to do the SharePoint provisioning, we will have to enable the Custom Scripting. Enough talking, let’s jump into the coding. I hope you will find this post useful.
Before you start Provisioning your site
Before you jump into the process of provisioning there is some configuration which you must perform.
- Enable the Custom Scripting
- Set the User as a Term Store Admin
Enable the Custom Scripting
With the latest release, Microsoft had deactivated this feature from the modern SharePoint experience thus we would have to enable it manually. According to Microsoft, below are the features which will not be available until you manually enable the custom scripting.
- Save Site as Template
- Save document library as template
- Solution Gallery
- Theme Gallery
- Help Settings
- HTML Field Security
- Sandbox solutions
- SharePoint Designer
- Uploading files that potentially include script
In our case, we wanted to do SharePoint PnP provisioning, and it is interesting that it is not mentioned anywhere that we need to enable custom scripting to do SharePoint PnP provisioning. You can always enable the Custom Scripting in two ways, one is using the portal, and another is to use PowerShell commands. I would prefer using the PowerShell commands as it will enable the custom scripting right away. If you enable the custom scripting via the portal, it will take 24 hours to get it activated.
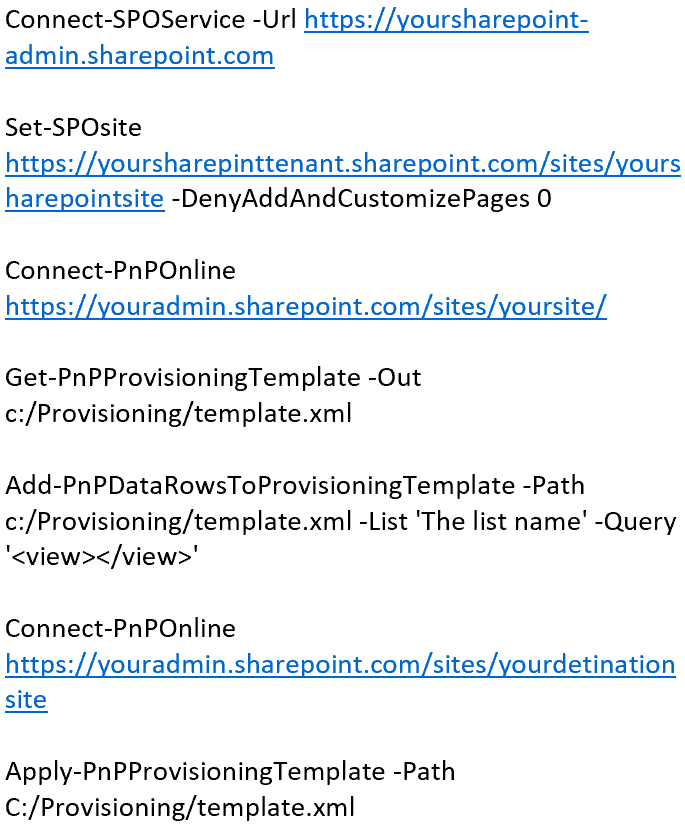
Connect-SPOService -Url https://yoursharepoint-admin.sharepoint.com
The above command will connect your SharePoint admin site, please be noted that you should have a tenant admin access to do this. If you don’t have the access, you should consider getting the access or you can request the tenant admin to do the same.
Once you are connected, you can perform the preceding command.
Set-SPOsite https://yoursharepinttenant.sharepoint.com/sites/yoursharepointsite -DenyAddAndCustomizePages 0
The above command will enable the custom scripting for the site you have mentioned. To check this, you can always go to any of your site collection/list settings, and if you see the option save the list as a template, it is done and you can proceed.
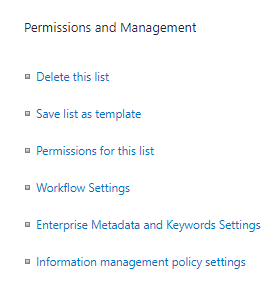
Save list as the template
Set the User as a Term Store Admin
Once we have enabled the custom scripting it is time to add you as the Term Store Admin, again you can always reach out to your Tenant admin to add you as a Term Store Admin. You can ask your Tenant admin to perform the preceding steps.
-
Sign in to Office 365 as a global admin or SharePoint admin.
- Click on the app launch icon( 9 dots) and then click on Admin to open the Microsoft 365 admin center.
- Select Admin centers and then click on SharePoint.
- Now, you should see an option as Term Store and click on it.
- He/She can add your mail id in the text box near to the heading Term Store Administrators
Once it is done you can always go to your Site Settings > Term Store Management > Term Store Administrators.
Start SharePoint PnP Provisioning
Wow!. We have done all the configuration and now we can start doing the provisioning.
Connect your source site
The first thing to do is, to connect the source SharePoint site, you can do that by using the preceding command.
Connect-PnPOnline https://youradmin.sharepoint.com/sites/yoursite/
Generate a provisioning template
Now we can generate a provisioning template from the web. You can do that by doing the command below.
Get-PnPProvisioningTemplate -Out c:/Provisioning/template.xml
Please be noted that this will create a new folder “Provisioning” in the C drive and then place the template.xml in it. You can always see the other options of Get-Pn
Add data to the provisioning template
As we have seen that the Get-Pn
Add-PnPDataRowsToProvisioningTemplate -Path c:/Provisioning/template.xml -List 'The list name' -Query '<view></view>'
Please see here to see the other options you can use with the Add-Pn
Apply provision to your destination site
Now we have an XML file which has everything we need to move. Let’s just do it then. Connect your destination site by following the command below.
Connect-PnPOnline https://youradmin.sharepoint.com/sites/yourdetinationsite
Please remember to use the same id and password of your Term Store Admin account.
Once you are connected to the destination site, you can perform the Apply-PnPProvisioningTemplate as follows.
Apply-PnPProvisioningTemplate -Path C:/Provisioning/template.xml
If you are getting an error as ” Apply-PnPProvisioningTemplate : The parent content type specified by content type identifier does not exist”, you will have to enable the SharePoint Server Publishing feature in the Site Settings > Site Features. Remember to enable the SharePoint Server Publishing Infrastructure under Site Settings > Site Collection Features before you enable the SharePoint Server Publishing feature in the Site Settings. It is a dependency. You can always see my StackExchange answer here.
Apply-PnPProvisioningTemplate : The parent content type specified by content type identifier does not exist.
At line:1 char:1
+ Apply-PnPProvisioningTemplate -Path C:\Provisioning\template.xml
+ ~~~~~~~~~~~~~~~~~~~~~~~~~~~~~~~~~~~~~~~~~~~~~~~~~~~~~~~~~~~~~~~~
    + CategoryInfo          : WriteError: (:) [Apply-PnPProvisioningTemplate], ServerException
    + FullyQualifiedErrorId : EXCEPTION,SharePointPnP.PowerShell.Commands.Provisioning.ApplyProvisioningTemplate
Please be noted that you will also get an error as “WARNING: ListInstance Style Library is a Style Library of a site with NoScript enabled and will be skipped” if the custom scripting is not enabled.
You will also get an error as “Access denied. You do not have permission to perform this action or access this resource” if you don’t have Term Store Admin permission.
Apply-PnPProvisioningTemplate : Access denied. You do not have permission to perform this action or access this resource.
At line:1 char:1
+ Apply-PnPProvisioningTemplate -Path C:/Provisioning/template.xml
+ ~~~~~~~~~~~~~~~~~~~~~~~~~~~~~~~~~~~~~~~~~~~~~~~~~~~~~~~~~~~~~~~~
    + CategoryInfo          : WriteError: (:) [Apply-PnPProvisioningTemplate], ServerUnauthorizedAccessException
    + FullyQualifiedErrorId : EXCEPTION,SharePointPnP.PowerShell.Commands.Provisioning.ApplyProvisioningTemplate
Once you run the Apply-PnPProvisioningTemplate command, and if everything is fine, you will get everything in your destination site. It will take some time to generate everything for you and add the data to it, depends on the amount of the data you have the process can take from 5 minutes to hours.
Conclusion
Congratulation, we have successfully moved all of our data and almost everything from one SharePoint site to other. In this article, we have learned how to,
- Enable Custom Scripting in SharePoint
- Add a Term Site Admin
- Connect to a SharePoint site
- Create a PnP provisioning template from the web
- Add data to your Provisioning template form the lists
- Apply the provisioning to the destination SharePoint site
Your turn. What do you think?
Thanks a lot for reading. I will come back with another post on the same topic very soon. Did I miss anything that you may think which is needed? Could you find this post as useful? Kindly do not forget to share me your feedback.
Kindest Regards
Sibeesh Venu