
[toc]
Introduction
In this article, we will learn how we can create an end to end tests (e2e) for our Angular application. We will be using an existing end-to-end testing framework, which is nothing but, Protractor. Protractor runs your tests against your application running in a real browser, in the same way, your user may perform the actions. I will be using an existing application which is available in my GitHub profile. The same can be available in the source code section. Please do share your feedback with me. I hope you will like this article. Let’s start coding.
Source Code
The source code can be found here. Please clone this repository before you start.
Importance of End to End Testing
Some of you might have already started writing an end to end testing for your application, and you may be knowing how important that is. Here in this section, I will list down the key benefits of an end to end testing.
- End to end testing tests the complete flow or the action. For example, a complete login process can be treated as one end to end testing. Basically, it tests a specific functionality.
- It doesn’t improve the code quality as does in Unit testing. Unit testing is a different topic, and an end to end testing and unit testing are completely different.
- As I said earlier, an end to end testing run tests on the browser, so it tests your application live, with some real data.
- You can easily find out if any functionalities are broken because of your recent changes or implementation
Basic overview
If you have already cloned the application, you should be able to see a folder e2e in your application code, open that folder. You can see 3 files as below.
- tsconfig.e2e.json
- app.po.ts
- app.e2e-spec.ts
Here tsconfig.e2e.json is the configuration file, if you open that file, you can see that the file is been extended from tsconfig.json.
{
  "extends": "../tsconfig.json",
  "compilerOptions": {
    "outDir": "../out-tsc/e2e",
    "baseUrl": "./",
    "module": "commonjs",
    "target": "es5",
    "types": [
      "jasmine",
      "jasminewd2",
      "node"
    ]
  }
}
app.po.ts is the page object, this is really helpful and important. Here is the place, where we will write the codes to find out the elements on our page or view. So, in future, if you are changing the selectors of your element, your changes will impact only in this file, so that you don’t need to change anything in your tests. Isn’t that handy? By default, this file will have the codes as below.
import { browser, by, element } from 'protractor';

export class AppPage {
  navigateTo() {
    return browser.get('/');
  }

  getParagraphText() {
    return element(by.css('app-root h1')).getText();
  }
}
As you can see, on the first line, we are importing browser, by, an element from protractor.
- browser, is for interacting with the browser
- by, is for finding the element by CSS or any other function
- element, is for converting the selected element
Here in this line, element(by.css(‘app-root h1’)).getText(), like you have already guessed, we are just finding an element with the selector ‘app-root h1’
app.e2e-spec.ts is the tests holder. We will be writing all of our tests here.
import { AppPage } from './app.po';

describe('my-angular5-app App', () => {
  let page: AppPage;

  beforeEach(() => {
    page = new AppPage();
  });

  it('should display welcome message', () => {
    page.navigateTo();
    expect(page.getParagraphText()).toEqual('Welcome to ng5!');
  });
});
The first thing we do is, importing the page, in this case, AppPage. This will be very easy for you if you have already written any unit test cases using jasmine. If you are not sure about how you can write the unit tests, I recommend you to visit this link.
Once we import the page, we are declaring an object and initialize the same with an AppPage instance in beforeEach function, so that the code can be executed before each test runs.
And in our first test, we are just confirming that the title is ‘Welcome to app’ by getting the value from our page object by calling page.getParagraphText().
Creating Login Component
As you all know, a component will have two files by default.
- login.component.html
- login.component.ts
login.component.html
Let’s write some HTML code for our component.
<div class="container" style="margin-top:100px;">
  <div class="row justify-content-center align-items-center">
    <div class="col-lg-4 col-sm-4 center-block ">
      <mat-card>
        <mat-card-header>
          <img mat-card-avatar src="../../../assets/images/App-login-manager-icon.png">
          <mat-card-title>Login here</mat-card-title>
          <mat-card-subtitle>Trust us for your data, and sign up</mat-card-subtitle>
        </mat-card-header>
        <mat-card-content>
          <div class="signup-fields">
            <form id="loginForm"[formGroup]="form" (ngSubmit)="login()">
              <div class="form-group">
                <input name="email" class="form-control" matInput type="email" placeholder="Email" formControlName="email" />
              </div>
              <div class="form-group">
                <input name="password" class="form-control" matInput type="password" placeholder="Password" formControlName="password" />
              </div>
              <div>
                <button id="btnSubmit" mat-raised-button type="submit" color="primary">Login</button>
              </div>
            </form>
          </div>
        </mat-card-content>
      </mat-card>
    </div>
  </div>
</div>
login.component.ts
import { Component, OnInit } from '@angular/core';
import { FormBuilder, Validators } from '@angular/forms';
import { Router } from '@angular/router';
import { AuthService } from '../auth.service';

@Component({
  selector: 'app-login',
  templateUrl: './login.component.html',
  styleUrls: ['./login.component.css']
})
export class LoginComponent implements OnInit {
  form;
  constructor(private fb: FormBuilder,
    private myRoute: Router,
    private auth: AuthService) {
    this.form = fb.group({
      email: ['', [Validators.required, Validators.email]],
      password: ['', Validators.required]
    });
  }

  ngOnInit() {
  }

  login() {
    if (this.form.valid) {
      this.auth.sendToken(this.form.value.email)
      this.myRoute.navigate(["home"]);
    }
  }

}
If you run the application, you can see that we are accepting the form only if we give relevant values to the fields, if not given, the form will be invalid. In our next step, we will write an end to end test for this functionality. Sounds good?
Write end to end tests for Login component
To get started, let us create two files as below.
- login.po.ts
- login.e2e-spec.ts
Now let us define our page and some functions in login.po.ts.
Set up login.po.ts
Open the file and write some code as preceding.
import { browser, by, element } from 'protractor';

export class LoginPage {
    navigateTo(){
        return browser.get('/login');
    }
}
Now we will write the codes to find the email and password text boxes.
getEmailTextbox() {
 return element(by.name('email'));
}

getPasswordTextbox() {
 return element(by.name('password'));
}
Set up login.e2e-spec.ts
It is time to set up our spec file before we start writing the tests.
import { LoginPage } from './login.po';

describe('Login tests', () => {
    let page: LoginPage;

    beforeEach(() => {
        page = new LoginPage();
        page.navigateTo();
    });
});
We have imported our login page and initialized the same. It is time to write the tests now.
it('Login form should be valid', () => {
 page.getEmailTextbox().sendKeys('info@sibeeshpassion.com');
 page.getPasswordTextbox().sendKeys('1234');

 let form = page.getForm().getAttribute('class');

 expect(form).toContain('ng-valid');
});
Here what we are doing is, set the values to our text boxes by using sendKeys function and then find the class attribute of our form, so that we can check whether it is valid or not. If the form is valid, the form will be having the class as ng-valid, if not, it will have ng-invalid class.
Run end to end test
Running end to end test is as easy as falling off a log. As we are using Angular CLI, all we have to do is run the command ng e2e. This will be set in our package.json file.
"scripts": {
    "ng": "ng",
    "start": "ng serve",
    "build": "ng build",
    "test": "ng test",
    "lint": "ng lint",
    "e2e": "ng e2e"
  }
let us run ng e2e now.
PS F:\My Projects\ng5> ng e2e
If everything goes well, your application should open in a browser and test the functionality. You will also get a message saying “Chrome is being controlled by automated test software”.
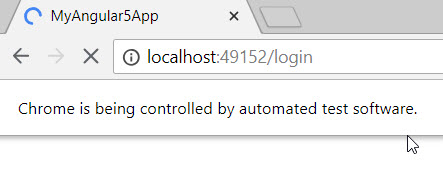
ng e2e browser output
And in your terminal console, you should see an output saying all of your tests are passed.
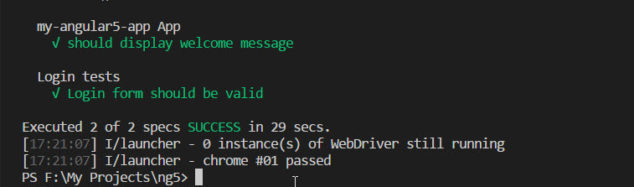
Automated test output
Writing a few more tests
Let us write a few more tests to check some other functionalities.
Check form is invalid
To check the form is invalid or not, we need to pass some invalid data to the form. The final test should be as follows.
it('Login form should be invalid', () => {
 page.getEmailTextbox().sendKeys('');
 page.getPasswordTextbox().sendKeys('');

 let form = page.getForm().getAttribute('class');

 expect(form).toContain('ng-invalid');
});
Check whether the value is been saved to local storage
You might have already looked at what is the functionality we are doing when we click the login button in our application. For now, we are just saving the email value to the local storage. Below is the function which gets called when we click the login button.
login() {
    if (this.form.valid) {
      this.auth.sendToken(this.form.value.email)
      this.myRoute.navigate(["home"]);
    }
  }
And this is the sendToken method in out AuthService.
sendToken(token: string) {
    localStorage.setItem("LoggedInUser", token)
 }
Now, we are going to write an automated test for this functionality. First, let us add a function which returns submit button in login.po.ts.
getSubmitButton() {
 return element(by.css('#btnSubmit'));
}
Now, write the test as preceding.
it('Should set email value to local storage', () => {
 page.getEmailTextbox().sendKeys('info@sibeeshpassion.com');
 page.getPasswordTextbox().sendKeys('1234');

 page.getSubmitButton().click();

 let valLocalStorage = browser.executeScript("return window.localStorage.getItem('LoggedInUser');");
 expect(valLocalStorage).toEqual('info@sibeeshpassion.com');
});
As you can see that, we are actually setting some valid data to the form and triggering the click event of our button, and the value of the email text box is being saved to the localStorage. In our test, we are checking the value of the localStorage by executing the script browser.executeScript(“return window.localStorage.getItem(‘LoggedInUser’);”). We should get an output as below if everything is fine.
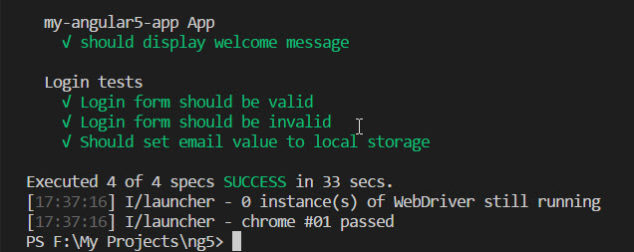
locaStorage in Protractor
Conclusion
Thanks a lot for reading. I will come back with another post on the same topic very soon. Did I miss anything that you may think which is needed? Could you find this post as useful? I hope you liked this article. Please share me your valuable suggestions and feedback.
Your turn. What do you think?
A blog isn’t a blog without comments, but do try to stay on topic. If you have a question unrelated to this post, you’re better off posting it on C# Corner, Code Project, Stack Overflow, Asp.Net Forum instead of commenting here. Tweet or email me a link to your question there and I’ll definitely try to help if I can.
Kindest Regards
Sibeesh Venu