
[toc]
Introduction
I understand that there are many article on the same topic. But most of the solutions didn’t work for me with the latest pipeline configuration, so, I thought of writing this article. Here, we are going to set up our Build and Release pipeline configuration of our Angular application very easy, in fact, by following some basic tasks. We will be using Azure DevOps FTP pipeline service connection for the configuration. Let’s stop the introduction and jump in to the configuration.
Background
I was trying to deploy my Angular application to Azure, for that I wanted to set up my build and release pipelines. I had followed some tutorials which are available already, but I was facing some issues with the same. Later, I had decided to use the Azure FTP Upload Release Task. So, basically, we will be having only one task in our Release pipeline.
Set Up the Pipelines
As I was mentioning, here, we are going to configure our Build and Release configuration.
Build Pipeline
Here we are going to configure the Azure DevOps build pipeline. But, before, we need to define our script in the package.json file.
If you have different routes, and if you need to access them directly in the URL of the browser, you should consider adding a web.config file in your src folder.
Once that is done, add it as an asset in the angular.json file.
Now, go to your Azure DevOps site, and click on Pipelines and then Builds. Click on the plus icon.
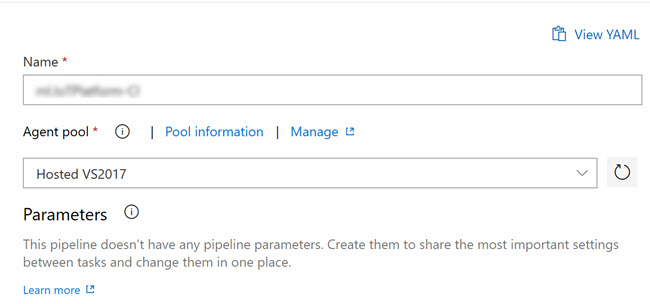
Pipeline
Click on the Pipeline section. Here you can mention your pipeline name and the Agent pool, please remember to select the Agent pool as Hosted VS2017, or else you may end up seeing an error as “Npm failed with return code: 1 2019-01-07T10:14:37.3309955Z ##[section]Finishing: npm build“.

Phase 1
I recommend you to leave this as it is, you can change the display name though.
npm install
Click on the + icon in the Phase section and search for “npm” and click add. Now we can configure this task.


You can also click on the ribbon View YAML, to see the version of the task.
npm build
In this step, we will add a new npm task and configure it for our build script.

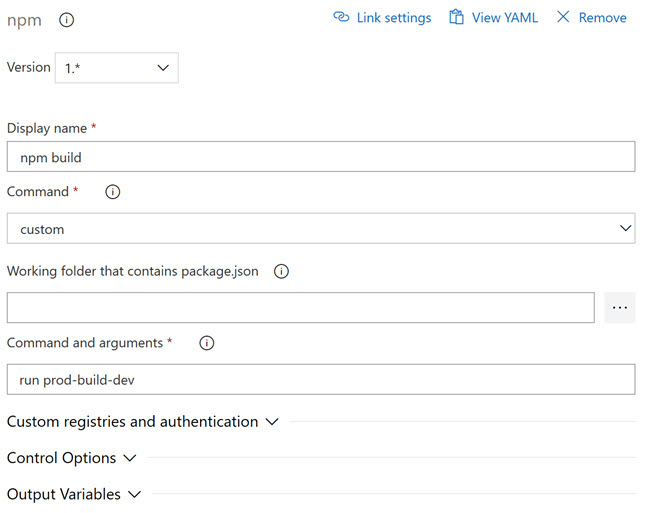
Please be noted that the command is custom and we have given the script which we have already set in our package.json file, which is prod-build-dev.
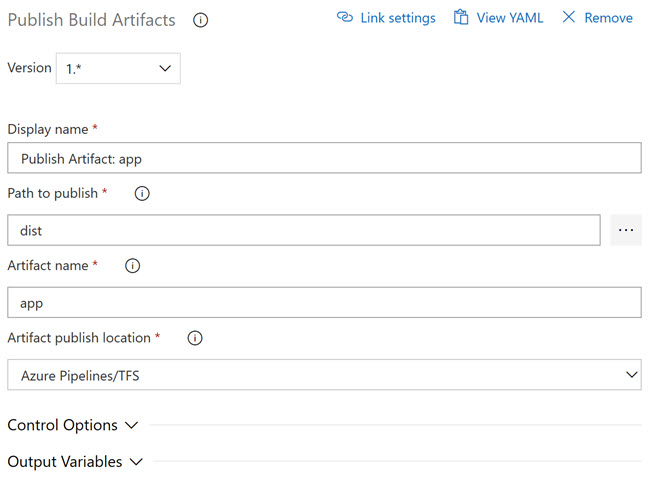
Publish Artifact
Here, in this step, we will publish our artifacts generated. This is very important, otherwise, the release configuration will not be able to find your package.json file in the directory. Add a new task called “Publish Build Artifacts” and configure the same as mentioned in the image below.

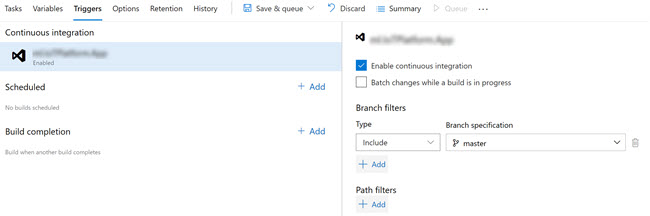
Enable the Continuous Integration
As we have set up the Tasks, now it is time to set up the continuous integration. Click on the Triggers section and check the Enable continuous integration.

Debugging the Build
If you ever need to debug the build pipeline, you can enable the same in the Variable section. Just making the system.debug value to true will do the trick.


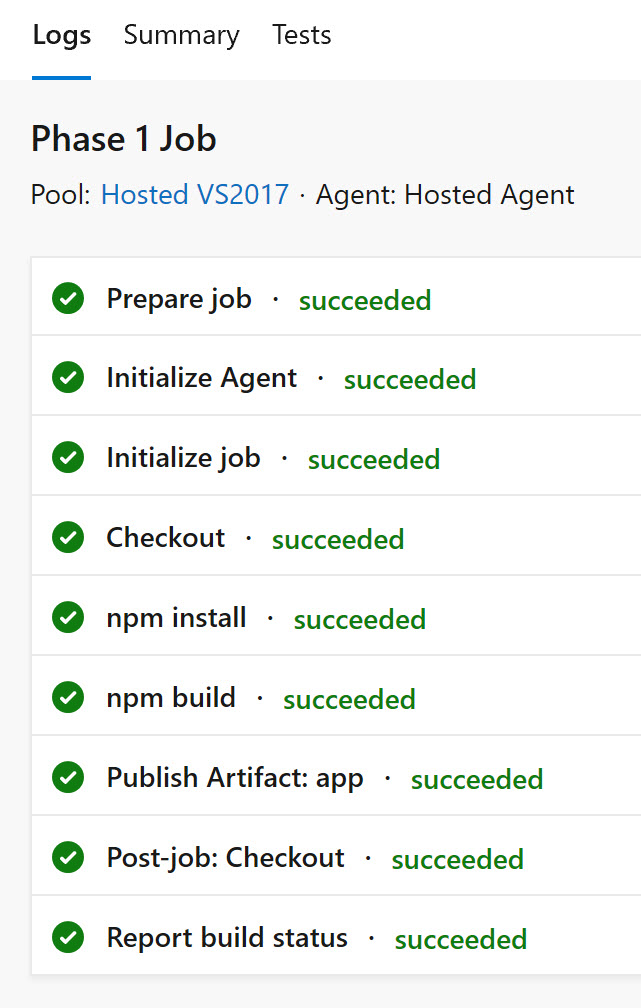
Run the Build
Once you are done everything, you can click on the Save & Queue button to initiate the build. Our Agent will run now, the tasks will be executed, as we have enabled the debug property to true in the Variables, we can now see the detailed logs in the console. The following tasks will be happening.

Release Pipeline
Wow, we have successfully created our build pipeline, now it is time to create a Release pipeline. As I mentioned earlier, we are going to have only one Task in our Release pipeline, which is nothing but “FTP Upload”. Click on the Pipelines and then Releases, click on the +New icon to create a new Release pipeline.
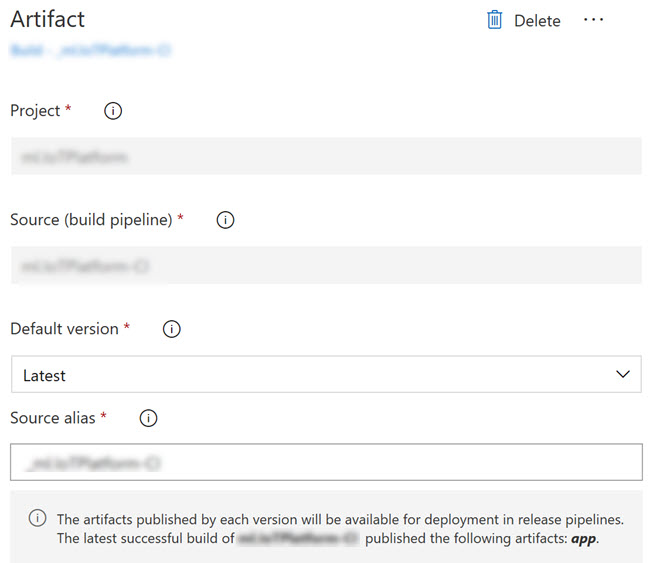
Select the Artifacts
Here, in this step, we should select the Artifacts generated in the build.

Select the Stage
Click on the Stages and add one.
Adding a FTP Service Connection
Before we add a new FTP Upload task, we need to create a new FTP service connection in our Azure DevOps site. Click on the Project Settings on the bottom left corner, go to the Pipelines section, and then click on the Service connections. Now click on the + New service connection, in the pop up you need to provide the details which you can get from the Publish profile of your Azure Web App (Click on the Get Publish Profile in your Web App resource, overview section in the Azure portal).


Add the FTP Upload Task
Now it is time to add the FTP Upload Task. Click on the + icon in the Agent Job Task and add the task FTP Upload.


Here the remote directory is the folder where our application files are going to be, you should be able to see those files if you just log in to the explorer using your FTP details from your app publish profile.
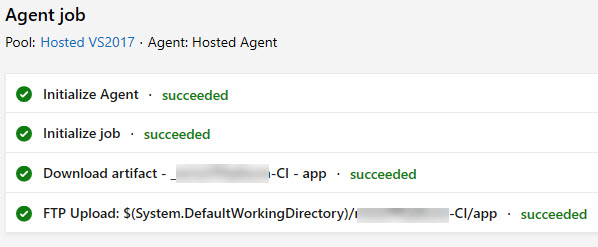
Create a Release
Now, it is time to create a Release, click on the + Release button and then + Create a release. In the upcoming window, you should be able to see the pipeline and the Artifacts selected. Just click on the Create button. The Agent will be started in a few seconds, once it is ready, it will execute the tasks. Please be noted that the FTP Upload task will remove the content from the directory first and then upload the new one.

Change the App Service Virtual Path
As we have given a custom folder in the Release configuration, we should also change the Virtual Path of the Azure App service. To do so, go to your Azure App Service and then select Virtual Path under Application Settings. Set the Virtual Path as “/” and Virtual Path as “site\wwwroot\wwwroot\yourappname(the folder name inside dist folder)” and the type as “Application”.


Once you are done, you can see your Angular application running.
Conclusion
Wow!. Now we have learned,
- How to set up the Azure DevOps Build Pipeline configuration
- How to set up the Azure DevOps Release Pipeline configuration
- How to create new FTP Service Connection in Azure DevOps
- How to configure Azure Web App
You can always read my articles related to Azure here.
Your turn. What do you think?
Thanks a lot for reading. Did I miss anything that you may think which is needed in this article? Could you find this post as useful? Kindly do not forget to share me your feedback.
Kindest Regards
Sibeesh Venu