Sending data to another domain usign postMessage

[toc]
Introduction
In this post, we will see how we can send data to another domain from our application. You can simple called it as a cross domain data sharing. In few cases we may need to send some data which is needed for our other domain or application to work as expected. I had some cases in my programming life. I have done this requirement with the help of postMessage method. The window.postMessage method helps us to enables cross-origin communication. I hope you will like this.
Clone Source Code
Background
I was forced to maintain some cookies in my second application every time. That too I wanted to set the same for my first application. So I implemented this with the help of window.postMessage. For the demo purpose, here I am creating two application.
- CrossDomainDataSharing
- Receiver
Using the code
First, we will concentrate on the CrossDomainDataSharing application in which we are sending our data to Receiver application.
To start with you need to add jQuery reference to your page. And to make this application trendy, I have added Smart Alert to our application, you can see the needed references and styles below.
[html]
<script src=”Scripts/jquery-2.2.0.min.js”></script>
<script src=”js/alert.min.js”></script>
<link href=”css/alert.min.css” rel=”stylesheet” />
<link href=”themes/dark/theme.css” rel=”stylesheet” />
[/html]
Next thing is “Calling Window On Load” Function.
[js]
window.onload = function () {
document.getElementById(‘btnSend’).addEventListener(‘click’, sendData);
};
[/js]
Here we are just adding a click event to the button with id btnSend. Before going to add the event, please make sure that you have created a button.
[html]
<button id=”btnSend”>Send Feedback</button>
[/html]
The next thing is to create an iframe and load our second application link to that by giving src value.
[html]
<iframe id=”ifrLoad” src=”http://localhost:55592/Receiver/Cross-Domain-Data-Sharing-Receiver.html” style=”display: none;”>
<p>Oops!. Your browser does not support iframes.</p>
</iframe>
[/html]
Have you noticed that we have called a function called sendData. Let us see what that function does.
[js]
function sendData(e) {
try {
$.alert.open(‘prompt’, ‘Please send your feedback!.’, function (button, value) {
if (button == ‘ok’) {
e.preventDefault();;
var myIfr = window.frames[‘ifrLoad’].contentWindow;
myIfr.postMessage(value, ‘http://localhost:55592/Receiver/Cross-Domain-Data-Sharing-Receiver.html’)
$.alert.open(‘Thank you so much for your feedback.’ || ‘No value has been entered’);
}
});
} catch (e) {
console.log(‘Error: ‘ + e.message);
}
}
[/js]
We are creating a smart alert first if the user says ‘Ok’, we will just pass the given feedback to our second application with the help of postMessage method. The implementation is pretty simple. Isn’t it?
You can style the button you have created as follows.
[css]
<style>
#btnSend {
margin-left: 11px;
border: solid 1px #000;
padding: 9px 22px 7px;
min-width: 32px;
font-weight: bold;
line-height: 13px;
color: #fff;
text-shadow: 0 1px 1px rgba(0, 0, 0, 0.5);
background-color: #232323;
background-image: linear-gradient(#2b2b2b 1%, #1d1d1d 99%);
background-image: -webkit-linear-gradient(#2b2b2b 1%, #1d1d1d 99%);
background-image: -moz-linear-gradient(#2b2b2b 1%, #1d1d1d 99%);
background-image: -o-linear-gradient(#2b2b2b 1%, #1d1d1d 99%);
background-image: -ms-linear-gradient(#2b2b2b 1%, #1d1d1d 99%);
-pie-background: linear-gradient(#2b2b2b 1%, #1d1d1d 99%);
border-radius: 3px;
-webkit-border-radius: 3px;
-moz-border-radius: 3px;
-ms-border-radius: 3px;
box-shadow: 0 1px rgba(2, 3, 3, 0.5), 0 1px rgba(255, 255, 255, 0.07) inset, 0 0 0 1px rgba(255, 255, 255, 0.06) inset;
-webkit-box-shadow: 0 1px rgba(2, 3, 3, 0.5), 0 1px rgba(255, 255, 255, 0.07) inset, 0 0 0 1px rgba(255, 255, 255, 0.06) inset;
-moz-box-shadow: 0 1px rgba(2, 3, 3, 0.5), 0 1px rgba(255, 255, 255, 0.07) inset, 0 0 0 1px rgba(255, 255, 255, 0.06) inset;
-ms-box-shadow: 0 1px rgba(2, 3, 3, 0.5), 0 1px rgba(255, 255, 255, 0.07) inset, 0 0 0 1px rgba(255, 255, 255, 0.06) inset;
-o-box-shadow: 0 1px rgba(2, 3, 3, 0.5), 0 1px rgba(255, 255, 255, 0.07) inset, 0 0 0 1px rgba(255, 255, 255, 0.06) inset;
}
#btnSend:hover {
background-color: #404040;
background-image: linear-gradient(#515151 1%, #2e2e2e);
background-image: -webkit-linear-gradient(#515151 1%, #2e2e2e);
background-image: -moz-linear-gradient(#515151 1%, #2e2e2e);
background-image: -o-linear-gradient(#515151 1%, #2e2e2e);
background-image: -ms-linear-gradient(#515151 1%, #2e2e2e);
-pie-background: linear-gradient(#515151 1%, #2e2e2e);
box-shadow: 0 1px rgba(2, 3, 3, 0.5), 0 1px rgba(255, 255, 255, 0.07) inset, 0 0 0 1px rgba(255, 255, 255, 0.06) inset;
-webkit-box-shadow: 0 1px rgba(2, 3, 3, 0.5), 0 1px rgba(255, 255, 255, 0.07) inset, 0 0 0 1px rgba(255, 255, 255, 0.06) inset;
-moz-box-shadow: 0 1px rgba(2, 3, 3, 0.5), 0 1px rgba(255, 255, 255, 0.07) inset, 0 0 0 1px rgba(255, 255, 255, 0.06) inset;
-ms-box-shadow: 0 1px rgba(2, 3, 3, 0.5), 0 1px rgba(255, 255, 255, 0.07) inset, 0 0 0 1px rgba(255, 255, 255, 0.06) inset;
-o-box-shadow: 0 1px rgba(2, 3, 3, 0.5), 0 1px rgba(255, 255, 255, 0.07) inset, 0 0 0 1px rgba(255, 255, 255, 0.06) inset;
}
</style>
[/css]
Now that is all for the sending part, please see the complete code for our first application here.
[html]
<!DOCTYPE html>
<html>
<head>
<title>Cross Domain Data Sharing Demo – Sibeesh Passion</title>
<script src=”Scripts/jquery-2.2.0.min.js”></script>
<script src=”js/alert.min.js”></script>
<link href=”css/alert.min.css” rel=”stylesheet” />
<link href=”themes/dark/theme.css” rel=”stylesheet” />
<style>
#btnSend {
margin-left: 11px;
border: solid 1px #000;
padding: 9px 22px 7px;
min-width: 32px;
font-weight: bold;
line-height: 13px;
color: #fff;
text-shadow: 0 1px 1px rgba(0, 0, 0, 0.5);
background-color: #232323;
background-image: linear-gradient(#2b2b2b 1%, #1d1d1d 99%);
background-image: -webkit-linear-gradient(#2b2b2b 1%, #1d1d1d 99%);
background-image: -moz-linear-gradient(#2b2b2b 1%, #1d1d1d 99%);
background-image: -o-linear-gradient(#2b2b2b 1%, #1d1d1d 99%);
background-image: -ms-linear-gradient(#2b2b2b 1%, #1d1d1d 99%);
-pie-background: linear-gradient(#2b2b2b 1%, #1d1d1d 99%);
border-radius: 3px;
-webkit-border-radius: 3px;
-moz-border-radius: 3px;
-ms-border-radius: 3px;
box-shadow: 0 1px rgba(2, 3, 3, 0.5), 0 1px rgba(255, 255, 255, 0.07) inset, 0 0 0 1px rgba(255, 255, 255, 0.06) inset;
-webkit-box-shadow: 0 1px rgba(2, 3, 3, 0.5), 0 1px rgba(255, 255, 255, 0.07) inset, 0 0 0 1px rgba(255, 255, 255, 0.06) inset;
-moz-box-shadow: 0 1px rgba(2, 3, 3, 0.5), 0 1px rgba(255, 255, 255, 0.07) inset, 0 0 0 1px rgba(255, 255, 255, 0.06) inset;
-ms-box-shadow: 0 1px rgba(2, 3, 3, 0.5), 0 1px rgba(255, 255, 255, 0.07) inset, 0 0 0 1px rgba(255, 255, 255, 0.06) inset;
-o-box-shadow: 0 1px rgba(2, 3, 3, 0.5), 0 1px rgba(255, 255, 255, 0.07) inset, 0 0 0 1px rgba(255, 255, 255, 0.06) inset;
}
#btnSend:hover {
background-color: #404040;
background-image: linear-gradient(#515151 1%, #2e2e2e);
background-image: -webkit-linear-gradient(#515151 1%, #2e2e2e);
background-image: -moz-linear-gradient(#515151 1%, #2e2e2e);
background-image: -o-linear-gradient(#515151 1%, #2e2e2e);
background-image: -ms-linear-gradient(#515151 1%, #2e2e2e);
-pie-background: linear-gradient(#515151 1%, #2e2e2e);
box-shadow: 0 1px rgba(2, 3, 3, 0.5), 0 1px rgba(255, 255, 255, 0.07) inset, 0 0 0 1px rgba(255, 255, 255, 0.06) inset;
-webkit-box-shadow: 0 1px rgba(2, 3, 3, 0.5), 0 1px rgba(255, 255, 255, 0.07) inset, 0 0 0 1px rgba(255, 255, 255, 0.06) inset;
-moz-box-shadow: 0 1px rgba(2, 3, 3, 0.5), 0 1px rgba(255, 255, 255, 0.07) inset, 0 0 0 1px rgba(255, 255, 255, 0.06) inset;
-ms-box-shadow: 0 1px rgba(2, 3, 3, 0.5), 0 1px rgba(255, 255, 255, 0.07) inset, 0 0 0 1px rgba(255, 255, 255, 0.06) inset;
-o-box-shadow: 0 1px rgba(2, 3, 3, 0.5), 0 1px rgba(255, 255, 255, 0.07) inset, 0 0 0 1px rgba(255, 255, 255, 0.06) inset;
}
</style>
<script>
window.onload = function () {
document.getElementById(‘btnSend’).addEventListener(‘click’, sendData);
};
function sendData(e) {
try {
$.alert.open(‘prompt’, ‘Please send your feedback!.’, function (button, value) {
if (button == ‘ok’) {
e.preventDefault();;
var myIfr = window.frames[‘ifrLoad’].contentWindow;
myIfr.postMessage(value, ‘http://localhost:55592/Receiver/Cross-Domain-Data-Sharing-Receiver.html’)
$.alert.open(‘Thank you so much for your feedback.’ || ‘No value has been entered’);
}
});
} catch (e) {
console.log(‘Error: ‘ + e.message);
}
}
</script>
</head>
<body>
<button id=”btnSend”>Send Feedback</button>
<iframe id=”ifrLoad” src=”http://localhost:55592/Receiver/Cross-Domain-Data-Sharing-Receiver.html” style=”display: none;”>
<p>Oops!. Your browser does not support iframes.</p>
</iframe>
</body>
</html>
[/html]
Now we will concentrate on our second application ‘Receiver‘
We will just add a window load function with event listener which accepts the data from our first application. Please see the following code for furtehr clarification.
[js]
$(window).load(function () {
window.addEventListener(‘message’, addData);
function addData(e) {
document.cookie = “myData=” + e.data;
};
});
[/js]
Here myData is the cookie name.
You can see the complete code for our second application here.
[html]
<!DOCTYPE html>
<html>
<head>
<title>Cross Domain Data Sharing Receiver – Sibeesh Passion</title>
<script src=”Scripts/jquery-2.2.0.min.js”></script>
<script>
$(window).load(function () {
window.addEventListener(‘message’, addData);
function addData(e) {
document.cookie = “myData=” + e.data;
};
});
</script>
</head>
<body>
</body>
</html>
[/html]
Now it is time to see our output.
Output
While sending the data to our second application.

Cross_Domain_Data_Sharing_Sender
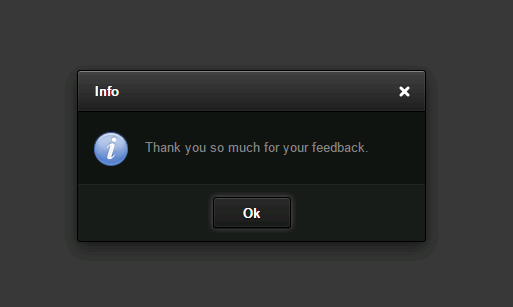
Smart_Alert
While receiving the data in our second application.
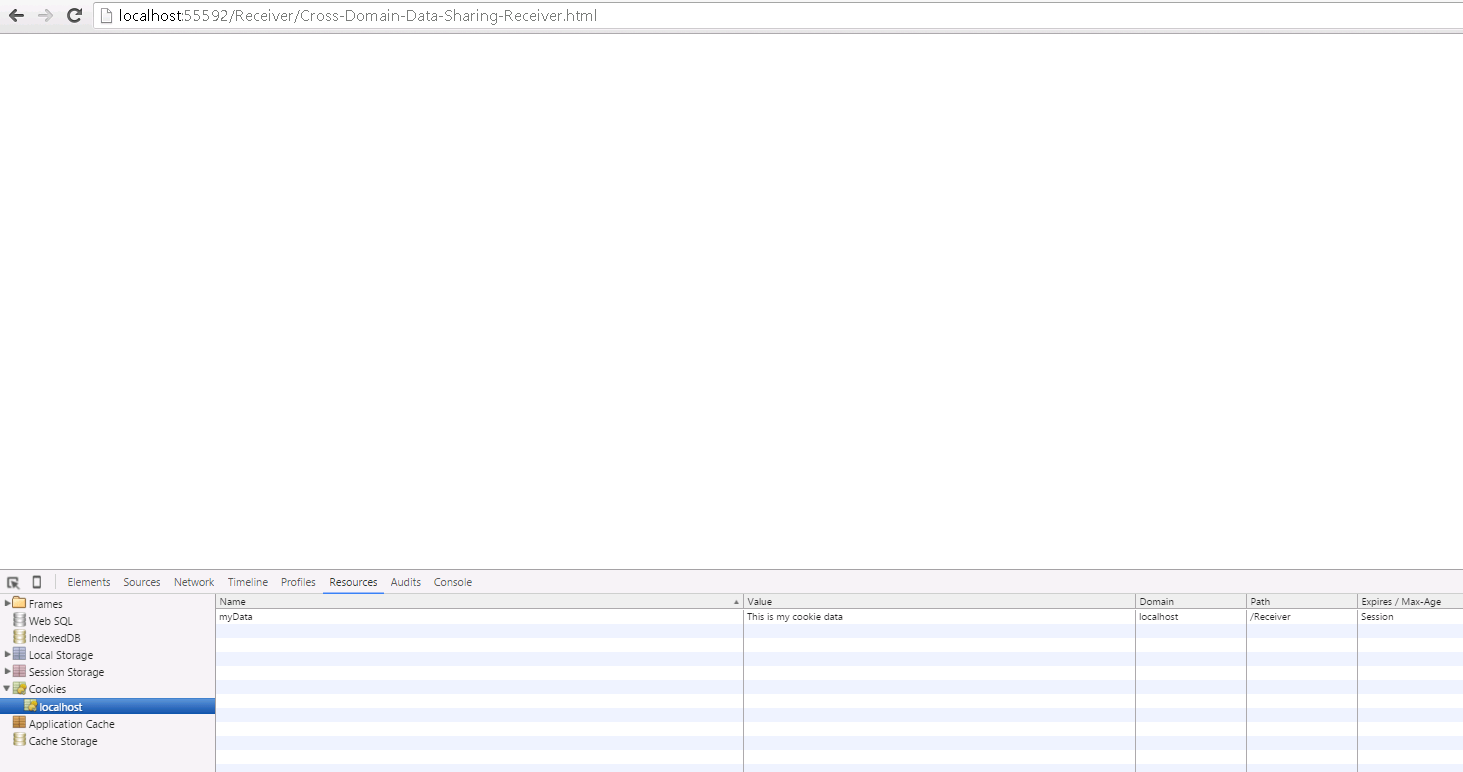
Receiving_data_from_another_domain
That is all. We did it. Have a happy coding.
Conclusion
Did I miss anything that you may think which is needed? Have you ever wanted to do this requirement? Could you find this post as useful? I hope you liked this article. Please share me your valuable suggestions and feedback.
Your turn. What do you think?
A blog isn’t a blog without comments, but do try to stay on topic. If you have a question unrelated to this post, you’re better off posting it on C# Corner, Code Project, Stack Overflow, Asp.Net Forum instead of commenting here. Tweet or email me a link to your question there and I’ll definitely try to help if I can.
Kindest Regards
Sibeesh Venu